How to Create a Successful Ticketed Event
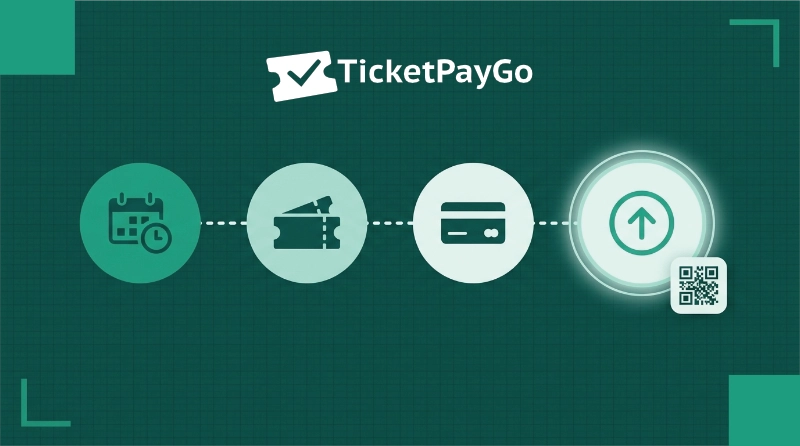
Congratulations on installing TicketPayGo! You're about to create your first ticketed event and start selling tickets directly from your WordPress website. This guide walks you through every step - from event details to your first sold-out.
What you'll accomplish: A fully functional event page with tickets ready to sell, payments configured, and a clear promotion plan. All in under 30 minutes.
Step 1: Set Up Your Event Details
Your event page is where potential attendees decide whether to buy. Make it count.
Navigate to Events
In your WordPress dashboard, go to TicketPayGo → Events → Add New Event.
Essential Event Information
- Event Title: Clear and descriptive. "Summer Music Festival 2026" beats "Music Event"
- Event Date & Time: Set the exact date and time - TicketPayGo handles timezone display automatically
- Location: Full venue address. Helps with SEO and gives attendees clear directions
- Event Description: Answer the key questions: What is this? Who should attend? What will they experience?
- Featured Image: Upload an eye-catching image (recommended: 1200x630px for best social sharing)
💡 Pro Tip: Write your description as if you're talking to a friend. "An unforgettable night with 5 local bands" converts better than "This event features musical performances."
Advanced Settings (Optional)
- Maximum Attendees: Set a capacity limit if your venue has restrictions
- Event Category: Useful if you run multiple event types
- Custom Fields: Dress code, age restrictions, what to bring - anything attendees should know
Action: Fill out all required fields and click Save Draft. Don't publish yet - set up tickets and payments first.
Step 2: Configure Ticket Types and Pricing
TicketPayGo lets you create multiple ticket types with different prices, quantities, and availability windows. The right structure depends on your type of event.
Single vs. Multiple Ticket Types
- Single Ticket Type: One price for everyone - simplest option, great for small or straightforward events
- Multiple Ticket Types: Different tiers with separate pricing and availability - recommended for maximizing revenue
In the event editor, scroll to the Ticket Types section and click Enable Multiple Ticket Types.
Recommended Ticket Structures by Event Type
Every event is different. Here are three common setups to get you started:
Concerts & Live Shows
Audience-driven events where atmosphere and access level vary:
- Early Bird (€20): Limited quantity, 2-week window. Rewards fans who commit early and generates upfront cash flow
- General Admission (€30): Your main volume tier
- VIP (€65): Front-of-stage, meet & greet, or exclusive merch. Doesn't need to sell many - adds meaningful revenue per ticket
- Group (4 tickets for €100): Encourages groups to come together
Collectors & Hobby Events (Trading Cards, Gaming, etc.)
These events often have different participation levels - browsing, trading, competing:
- Visitor (€10): Entry-only for browsing and trading
- Trader Table (€35): Includes a vendor spot or table
- Tournament Entry (€20): Competitive play, separate from general entry
- Bundle (Visitor + Tournament for €25): Rewards people doing both
Private Venue Events (Dinners, Workshops at Landhouses / Hotels)
Capacity-limited, experience-focused events where the personal touch matters:
- Standard Seat (€45): Full dinner or workshop access
- Premium Seat (€75): Better seating, priority service, or a personal add-on
- Table of 6 (€240): Group booking at a slight discount - fills your venue faster
- Waiting List (€0): Useful if you sell out - keep a queue and notify people automatically
Ticket Type Settings
For each ticket type you can set:
- Name & Description: What makes this tier special
- Price: Your default currency from Settings
- Quantity: Total available for this type
- Sale Start/End Dates: Control the window this tier is on sale
- Max Per Order: Prevent bulk purchasing (typically 10)
💡 Pro Tip - Scarcity Works
Limit Early Bird or discount tiers to 20-30% of your capacity and show the remaining count. "Only 8 tickets left at this price" drives immediate action far more effectively than a countdown timer.
Brand Your Event Card & Booking Experience
Your event card and booking modal are the first touchpoints with potential attendees. Consistent branding builds trust and makes your event feel professional.
Frontend Event Card Styling
Go to TicketPayGo → Customization to configure:
- Card Layout: Choose horizontal (image left, details right) or vertical (image top, details below). Horizontal works better on desktop, vertical is cleaner on mobile
- Card Image: Upload a cover image (1200x630px recommended). This appears on your events list and when shared on social media
- Brand Color: Set your primary brand color - this affects buttons, tags, and accent elements on the card
Best Practice: Use high-contrast colors for buttons (dark background + light text, or vice versa). Avoid low-contrast combinations like light blue on white.
Booking Modal Customization
The booking modal opens when someone clicks "Book Tickets". Configure it in the same TicketPayGo → Customization page under the Modal Customization section:
- Header Image: Optional banner image at the top of the modal (1200x400px works well)
- Brand Color: Should match your event card for consistency
- Button Style: Rounded or square corners - match this to your website's overall design language
Confirmation Email Customization
Your confirmation email is the last impression before the event. TicketPayGo includes a Visual Builder for designing emails without touching code.
Go to TicketPayGo → Email Settings and use the Visual Builder to configure:
Header Section:
- Header Logo: Upload from Media Library (recommended: 300x100px)
- Logo Position: Left, center, or right alignment
- Header Background Color: Your brand color
- Header Text: Main heading (e.g., "Order Confirmation")
- Header Text Color: Typically white on dark backgrounds
- Header Subtitle: Optional subheading
Content Section:
- Greeting Prefix: "Dear", "Hello", or "Hi"
- Greeting Text: Custom message after customer name
- Event Details Box: Toggle on/off, select which fields to show (event name, date, time, venue, location, order ID, tickets, total)
- QR Code Section: Toggle ticket QR code display
- Ticket Design Logo: Separate logo for the ticket card itself
- Calendar Buttons: Add to Google Calendar, Apple Calendar, Outlook, Yahoo
- Manage Tickets Link: Uses shortcode
[ticketpaygo_order_lookup]on a dedicated page
Footer Section:
- Email Footer Text: Appears below Apple Wallet button
- Footer Signature: Your closing message
Best Practice: The Visual Builder generates email-safe HTML automatically. Use your brand color consistently in the header, keep text readable (dark on light or light on dark), and enable the Manage Tickets link so customers can resend their tickets if needed.
Action: Create your ticket types, customize your branding, and click Save Draft.
Step 3: Connect Your Payment Gateway
TicketPayGo supports three payment gateways: Mollie, PayPal, and Stripe. Which one you connect depends on where your audience is.
Choosing the Right Gateway
Mollie - recommended for European events
Mollie is a single integration that gives your customers access to every major EU payment method: iDEAL, Bancontact, credit and debit cards, bank transfers, and more. For any event targeting a European audience, Mollie is the natural first choice. It handles everything in one place.
PayPal - for audiences who prefer PayPal
PayPal has a large installed user base and many buyers prefer paying with their PayPal balance or linked card. Worth enabling alongside Mollie if you want to cover that segment.
Stripe - for non-European or international events
Stripe is an excellent gateway but primarily recommended for events outside the EU or for international audiences where Mollie isn't the norm. If your attendees are mostly in the Netherlands, Belgium, or Germany - start with Mollie.
Setting Up Mollie
- Create a Mollie account at mollie.com
- Verify your business - takes 1-2 business days
- Get your API key: Mollie Dashboard → Developers → API Keys
- Add to TicketPayGo: Go to TicketPayGo → Settings → Payment Gateways → Mollie
- Enable your preferred payment methods from within the Mollie dashboard
Setting Up PayPal
- Create or log into your PayPal Business account at paypal.com
- Get your Client ID and Secret: My Apps & Credentials → Create App
- Add to TicketPayGo: Go to TicketPayGo → Settings → Payment Gateways → PayPal
- Paste your Client ID and Secret and save
Setting Up Stripe
- Create a Stripe account at stripe.com
- Get your API keys: Stripe Dashboard → Developers → API Keys
- Add to TicketPayGo: Go to TicketPayGo → Settings → Payment Gateways → Stripe
- Paste your Publishable key and Secret key and save
Testing Before You Go Live
Always run a test purchase before publishing:
- Switch to sandbox / test mode in your gateway settings
- Buy a ticket on your event page end-to-end
- Confirm the order confirmation email arrives with your QR code
- Open the Apple Wallet link if you have it enabled
- Check the order appears in TicketPayGo → Orders
- Scan the QR code with the scanner to verify check-in works
Then switch back to live mode before publishing.
Action: Connect your payment gateway(s), run a test purchase, and click Save Draft.
Step 4: Promote Your Event and Drive Sales
Your event is set up and payments work. Time to fill those seats.
Pre-Launch Checklist
- ✓ Event details are complete and accurate
- ✓ Featured image looks sharp on mobile and desktop
- ✓ All ticket types are configured with correct quantities and prices
- ✓ Payment gateway is live and tested
- ✓ Confirmation emails are sending with QR codes
- ✓ Event page URL is clean and shareable
Ready? Click Publish.
Week 1: Launch
Email your existing audience first. They're your warmest leads. Keep it simple: what the event is, when and where, a direct link to your ticket page, and mention Early Bird pricing if it applies.
Announce on social media. Post on all channels the same day. Create a Facebook Event and link back to your ticket page. Use Stories on Instagram. For business or professional events, LinkedIn tends to perform well.
Add the event to your website. Use TicketPayGo's Elementor widget or shortcode to display it on your homepage or a dedicated events page. Don't hide it in a submenu.
💡 Countdown posts work. "Early Bird closes in 5 days" or "Only 12 tickets left at this price" keeps the event in front of people who saw your first post but didn't act yet.
Weeks 2-4: Build Momentum
- Ask speakers, performers, or partners to share with their own audiences
- Email anyone who attended past events
- Submit to local event listings and community calendars - most are free
- If you have budget: Facebook or Instagram ads targeting your city or relevant interests convert well at €5-15/day
Final Week: Create Urgency
- Send a "last chance" email to anyone who opened your first announcement but didn't buy
- Post daily on social with remaining ticket count
- If you still have capacity, a small last-minute discount code can convert fence-sitters
Track What's Working
TicketPayGo → Analytics shows you ticket sales by type, sales over time, and order history. Keep an eye on which ticket tier sells first - that tells you where your real demand is.
What's Next?
Set Up QR Check-In
Your attendees receive a QR code in their confirmation email. On event day, use TicketPayGo's web-based scanner from any phone or tablet - no app download required.
Enable Apple Wallet
Let attendees save their ticket to Apple Wallet for quick access at the door. To enable it: go to TicketPayGo → QR Scanner, generate a connection code to connect your scanner, then click "Connect Apple Wallet" on the same page.
Review Your Analytics
After your event, check which ticket types sold best, when the sales spike happened, and use that to inform how you price and promote your next one.